How to Paint an Arch on Your Wall the Easy Way
Are you looking to add some character to your room without breaking the bank or exerting too much effort? Look no further! Painting an arch on your wall is a simple and effective way to add some visual interest to your space. In this article, we’ll explore why you should consider adding a painted arch to your room, the materials you’ll need, and a step-by-step guide on how to paint an arch.
Why Your Room Needs a Painted Arch
Before we dive into the nitty-gritty of how to paint an arch, let’s talk about why you should consider this trend. Not only are curves totally in right now, but they are also timeless. If you were to research arches online, you’d find them in many iconic places throughout history. While most of these historical arches are actual architectural structures, we can take this old idea and reinvent it for our modern spaces.
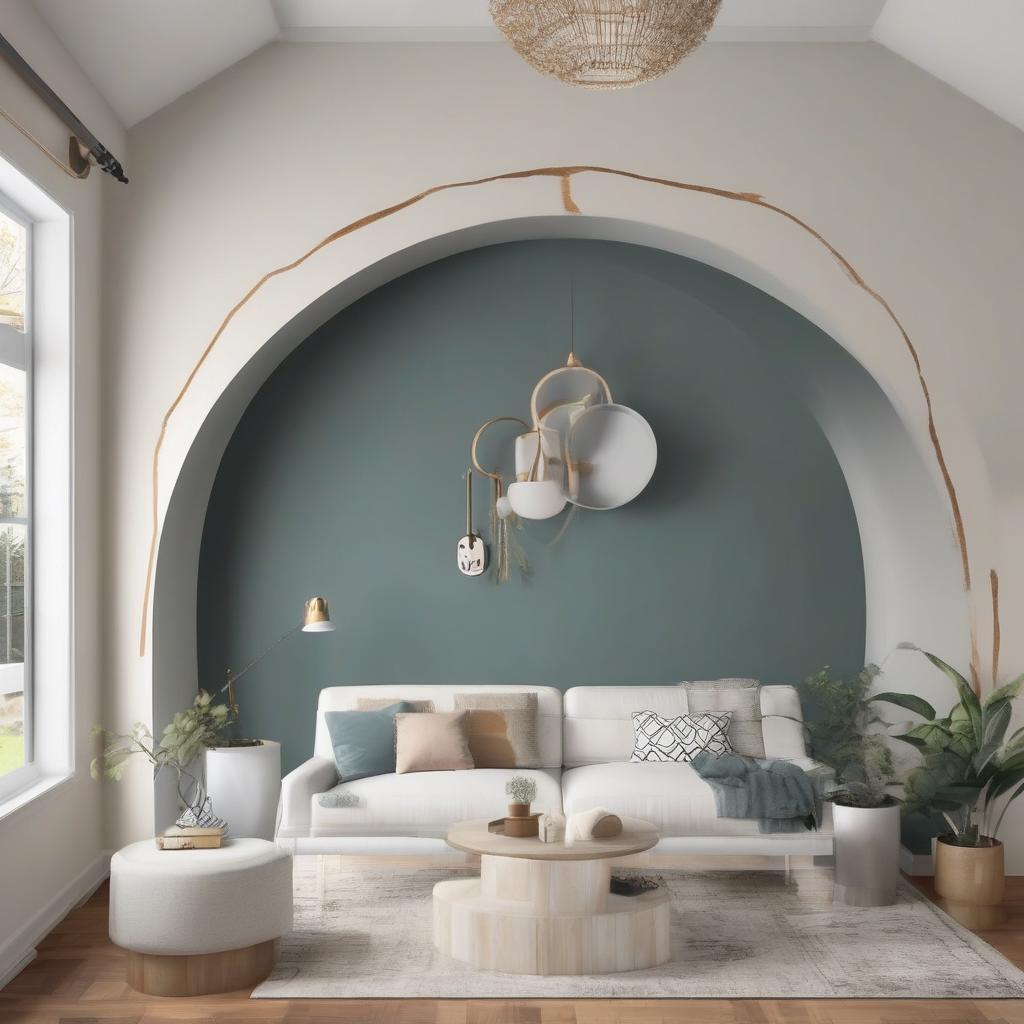
Painting an arch on your wall adds awesome dimension and creates interest in your room design. For example, in our gender-neutral nursery, we wanted to break up the wall into sections without making it too busy or overpowering, considering it’s a small room. The painted arch was the perfect solution to creating a pseudo-reading nook in a room that barely has space for a bed and a chair.
In addition to the aesthetic benefits, my absolute favorite part of adding a painted arch is that it’s ridiculously easy and super quick to complete, with a whole lot of impact, especially when paired with floating shelves.
Materials List
Now that we’ve convinced you to add a painted arch to your room, let’s gather our materials. To complete this project, you’ll need:
- Tape measure
- Laser level
- Pencil for lighter walls or Chalk for darker walls
- Thick string (you could use old gift wrap string, hemp, or anything that can stay taut)
- Push pin
- Frogtape
- Plastic credit card
- Your Paint of Choice
- Angled paint brush
- Paint roller
How to Paint an Arch
Now that we have all our materials ready to go, let’s talk about how to set up this arch before painting.
1. Measure Where Your Arch Will Go
You want to start by measuring where the straight edges of your archway will go. Consider how far you want to leave blank on either side of the straight edges, as well as how high you want the straight edges to go before starting the curved part of the arch. Once you get the width of your archway, cut it in half. This will be the radius or the length of string you’ll use to draw your arch.
Move your laser level to the center of your archway, which is the halfway measurement you just found. Next, determine the height of the actual curved portion of the arch. Don’t forget to take into account that the measurement of your half-width (the radius) is also how tall the curved portion of the arch will be. So, be careful not to position the start of your arch too high. If you’re a numbers person, measure how much space you want from the ceiling to the top of the arch and add it to the radius measurement. This will tell you how far down to put your push pin to start drawing your arch.
2. Draw Your Arch
Once you’ve determined where the curved part of the arch will start, add your push pin at the center at this measurement. Next, you’ll want to move your laser level to one side of the archway and add your Frogtape straight down. Repeat on the other side of the arch. This will be your boundaries for the straight areas of the archway. Use your plastic credit card to run over the top of the tape to make sure it adheres fully.
Now it’s time to draw the arch. Tie a string to your push pin and attach a pencil or chalk to the other end of the string, the same distance as your radius. Align your laser level with the push pin so you know where to start and stop the arch. Be sure to begin the arch where the wall meets the tape to make the straight edge and the circular part of the arch seamless. Don’t forget that you want the string to be pulled taut and the pencil or chalk to stay in the same position as you draw your half circle.
Before you get to the painting portion of this tutorial, if you have shelves to hang or anything that requires drilling, I suggest doing that before you paint. You don’t have to, but it will save you time and not mess up your newly painted surface when you go to attach the shelves or whatever else you’re hanging.
3. Paint Inside the Lines
The last step in this process is to grab your paint and angled paint brush to begin painting inside the lines. Follow the markings you made to paint the outline of the curve first. Once you have the outline of the arch, use your roller to paint the rest of the arch. For super crisp lines, roller over the Frogtape. The wetness of the paint helps the tape lock in. While the paint is still wet, remove your tape.
4. Add Accent Pieces and Enjoy!
We added more floating shelves to this area of the nursery. In hindsight, I would have hung these shelves a little lower so they sat more in the base of the arch and were in between the gaps of the other shelves to the left. But all in all, I love the added character this arch brings for little to no effort.
Want to Watch the Video for This Post?
You’re in luck! I put together a video tutorial to add to this post, so you can see the full scope in real-time! Check it out below and while you’re there, be sure to hit the subscribe button and turn on the bell notifications to make sure you never miss a new My Homier Home video!
By following these simple steps, you can add a beautiful painted arch to your room, creating a unique and visually appealing space that you’ll love spending time in. So, get creative, grab your paint and materials, and start painting your arch today!
Frequently Asked Questions
What is the main purpose of painting an arch on the wall?
_To add visual interest and dimension to the room design_
What materials are required to paint an arch?
_Tape measure, laser level, pencil/chalk, thick string, push pin, Frogtape, plastic credit card, paint, angled paint brush, and paint roller_
How do you determine the height of the curved portion of the arch?
_By considering the radius measurement and the desired space between the ceiling and the top of the arch_
Why is it recommended to hang shelves before painting?
_To avoid messing up the newly painted surface when attaching the shelves_
How do you achieve crisp lines while painting the arch?
_By roller painting over the Frogtape and removing it while the paint is still wet_
Can I watch a video tutorial for this project?
_Yes, a video tutorial is available to follow along with the steps_