Painting Shower Tile: A Cost-Effective Way to Give Your Bathroom a Makeover
Are you tired of looking at your outdated shower tile but don’t want to rip it out and replace it? Did you know that you can paint it? Painting shower tile is an involved process, but it’s not a hard one, and for about $100, you can give your shower a complete makeover.
The Motivation Behind Painting Shower Tile
I, too, had outdated tile in my master bathroom, and I didn’t want to rip it out and retile. I finally decided to give painting it a whirl, mostly because I like to experiment and I thought some of you might be curious about the process. Plus, I figured a solid white would be an improvement over the blue, gray, and swirlies.
Supplies Needed for Painting Shower Tile
Before you start painting, you’ll need to gather the necessary supplies. Here’s a list of what you’ll need:
- Rust-Oleum tub and tile paint (I used almost two boxes and did three coats)
- Cleaning supplies:
- bleach
- Comet
- Lime-A-Way
- abrasive pads
- sponge
- 400-600 grit wet/dry sandpaper
- 3M Safety Products:
- a respirator
- safety glasses
- gloves
- ScotchBlue Painters Tape
- brushes (I used foam rollers)
- paint tray and liners
- tools to remove caulk and grout (may or may not be needed)
- caulk (to reapply after painting)
- dropcloth
Step One: Prep Work
Preparing the tile is critical, and if you don’t do it thoroughly, the paint won’t adhere properly, and you’ll have a mess on your hands. Don’t be lazy with your prep!
Remove Caulk and Replace Grout
The very first thing you need to do is remove all the caulk from the areas you will be painting, since you can’t paint over it. This should be in all the corners of your shower. You can go back and add it after your shower is painted and dry. We didn’t have caulk in those areas, but rather cracked, chipped, and missing grout. My husband decided to go ahead and remove and replace the grout in those areas.
Cleaning the Tile
The first non-optional step to painting shower tile is cleaning it. Actually, the first four steps are cleaning. This was new territory for me, as I am terrible at cleaning our showers. Here are the cleaning steps:
- Clean with bleach water to remove mildew. Rinse.
- Scrub with Comet and an abrasive pad. Rinse.
- Clean with Lime-A-Way. Rinse.
- Sand with 400-600 wet/dry sandpaper. Rinse.
Let dry for at least an hour. The result? Insanely clean tiles. Literally so squeaky clean that I could have used the reflection to do my makeup.
Tape Off the Area
Next, I taped off the shower with ScotchBlue Painters Tape. I wanted to paint the tiles, but I didn’t want to paint the actual tub except for the front, because it had some discoloration. The tub was already white and not in bad shape. No need to fix what isn’t broken, right?
Step Two: Paint
Mix the Paint
Shower paint is a two-part epoxy paint that you mix together by pouring part A (the activator) into part B (the base). You can use it on porcelain, ceramic, and fiberglass.
Start Painting
First, use your brush to cut in the edges and corners, just like you would if you were painting a wall. When that’s done, go after it with a roller. Painting a tub may sound a little scary and intimidating, but really, it’s no different from painting anything else, and it doesn’t really take any longer. You only need to wait about an hour or two between coats.
The Smell
Okay, I lied a little – there is one major difference between painting shower tile and painting a wall. THE SMELL. The tile paint is so freaking ridiculously strong it’s insane. Do not even think about doing this without a respirator. I used this mask and could smell it a bit, but it wasn’t bad.
Step Three: Finish
As soon as you are completely finished painting, remove the tape. Then you just need to wait for it to dry for a few days before you start using your fresh new shower!
Two Things You Should NOT Do When Painting a Shower
Here are two things you should NOT do when painting a shower:
- Do NOT use a roller that isn’t foam. I did some research before starting this project, and it was recommended that you use a low nap roller over a foam roller. That’s all fine and dandy and obviously worked for some people, but my roller left tiny raised hairs all in my paint. Literally everywhere. I ended up sanding again after the first coat with the 600 grit sandpaper to smooth them out and using a foam roller for the rest.
- Do NOT use the same paint tray for consecutive coats. Use a liner and throw it away after each coat, even if the paint in it looks dry and safe to pour over. The new paint will reenergize the old stuff, just enough to leave tiny, bumpy, gelatinous spots all over your nice smooth paint job and make you want to hurt somebody.
Final Thoughts
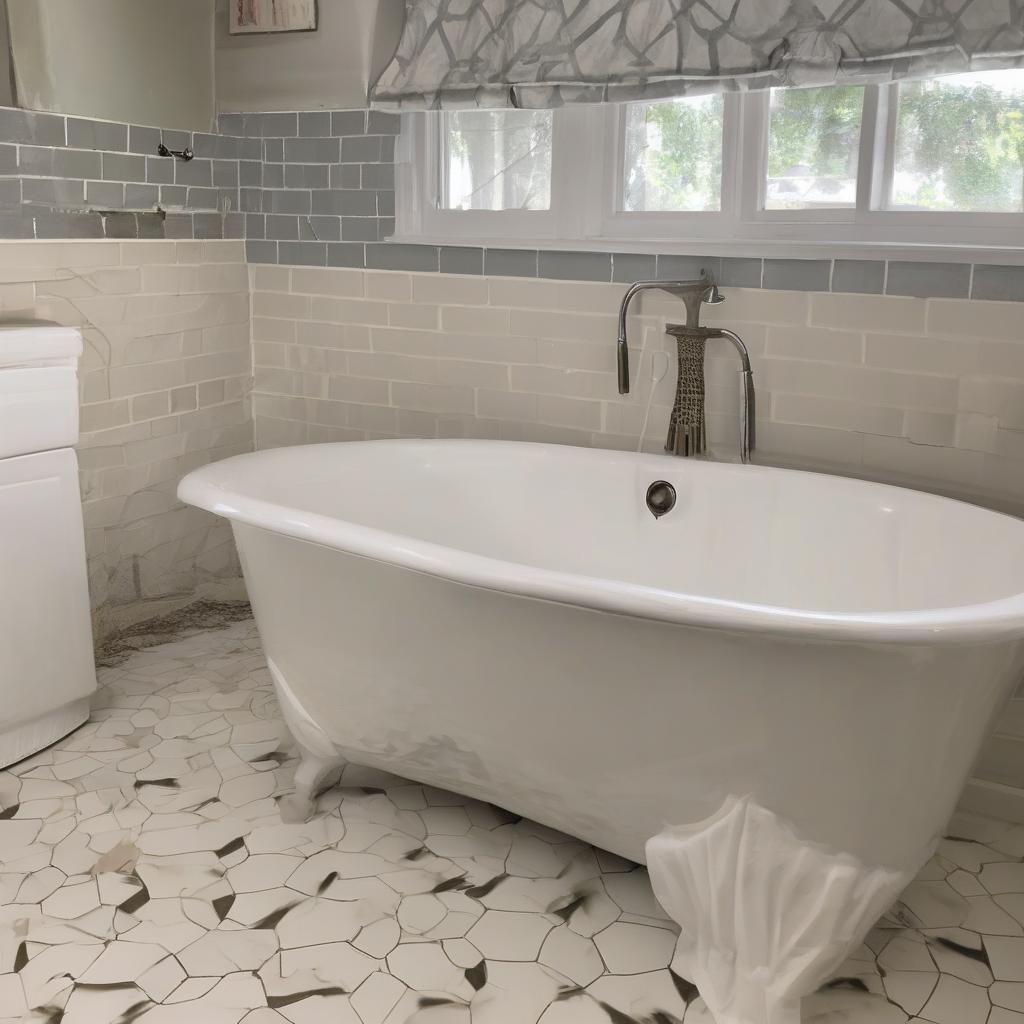
With that being said, here is the final product – it looks so bright and clean! Perhaps a little too bright and clean – I think I have to paint the tub now. I used to think it was white, but against the ultra-white paint, it looks gray and dingy. It looks better in pictures than in person. The finish on the paint is surprisingly great. It’s smooth and shiny and really doesn’t feel like it’s going anywhere.
Durability and Maintenance
Adam was very skeptical before we started, he told me just because you can fix things with paint doesn’t mean you should. Now that it’s complete, he suggested we do the guest bathroom as well. If you have any questions, just leave them in the comments, and I will do my best to answer you!
Update: Is Shower Paint Durable?
CLICK HERE TO SEE HOW IT IS HOLDING UP AFTER A YEAR!
Update2
I just saw that Rustoleum now makes a touch-up kit for this product! Now if I do get some chipping, I can easily fix it without buying and mixing up a quart of paint.
Other Painting Projects You Might Be Interested In
Have something besides a shower you want to paint? Rustoleum also makes kits for:
- Tile flooring
- Appliances
- Countertops
- Garage floors
- Cabinets
You may also like:
- How to Make Dirty Grout Look New
- Paper Bag Flooring A Tutorial
- My Painted Kitchen Cabinets Five Years Later
- How to make your kitchen look custom for under $50 (hint: It’s not paint!)
- How to turn a dresser into a bathroom vanity
Frequently Asked Questions
What is the cost of painting shower tile?
For about $100, you can give your shower a complete makeover.
What kind of paint is used for shower tile?
Rust-Oleum tub and tile paint, a two-part epoxy paint, is used for painting shower tile.
Is it necessary to remove caulk before painting?
Yes, you need to remove all the caulk from the areas you will be painting.
How many coats of paint are required?
The author used three coats of paint.
What type of roller should be used for painting shower tile?
A foam roller should be used, as a non-foam roller can leave tiny raised hairs.
How long does it take for the paint to dry?
You need to wait for a few days before using your shower after painting.
Is the paint durable?
The author has provided an update on the durability of the paint after a year.
Can the same paint tray be used for consecutive coats?
No, a new liner should be used for each coat to avoid bumpy, gelatinous spots.
Is a respirator necessary while painting?
Yes, a respirator is necessary due to the strong smell of the paint.
Can other surfaces be painted with Rust-Oleum products?
Yes, Rust-Oleum makes kits for tile flooring, appliances, countertops, garage floors, and cabinets.