

Transforming a Blank Wall into a Boho Oasis: A DIY Yarn Wall Hanging Tutorial
As an interior designer in the making, my 11-year-old neighbor had a big vision for her bedroom makeover, but a small budget to match. I wanted to find a creative way to fill one of her walls with a modern boho theme without breaking the bank. The result was a simple DIY yarn wall hanging that cost us less than $10.
The Problem: Filling a Large Blank Wall on a Budget
Blank walls can be difficult to fill, especially when you’re on a budget. Larger pieces are more expensive, and smaller pieces can often feel lost and out of proportion on a large wall. This yarn wall hanging was a great solution to that problem, as it added a lot of texture and color to the wall without costing much at all.
The Solution: A DIY Yarn Wall Hanging
This wall hanging was seriously easy to make, although it did take a while. You don’t need to be super crafty or skilled to make one, just some patience and basic supplies. We made a large wall hanging, but you can easily make a smaller one, which would be quicker and even cheaper.
Materials Needed:
For your convenience, I’ve created a list of the materials you’ll need to make this DIY yarn wall hanging.
- Dowel, copper pipe, or branch (we used a 34 x 36 inch dowel)
- Yarn in various colors (you can use a yarn bundle or purchase separate skeins)
- Tape measure
- Scissors
- Painters tape
- Twine (optional)
Step 1: Gather Supplies
Gather all the materials you’ll need for this project. You can find most of these supplies at a craft store or online.
Step 2: Decide on Your Pattern
If you’re creating a symmetrical piece, plan out your design ahead of starting. Decide which order you want to use your colors and the width that each color section will be. You can also lay out pieces of yarn to help visualize your design. If you’re going for an asymmetrical design, you can be more flexible and figure it out as you go along.
Step 3: Cut, Tie, and Repeat…
This is the repetitive, monotonous part of the process, but it’s also therapeutic. Cut pieces of yarn that are double the length you want your wall hanging to be. To attach them to the pole, fold a piece of yarn in half, put the folded end under the pole, poke the ends through the loop, and pull it tight. You can work on this project while watching TV or listening to a podcast.
Step 4: Trim into Shape
Once you’ve added all the yarn to the dowel, hang it in place on the wall and trim the yarn ends into shape. You can trim them straight across, into a symmetrical shape, or on an angle. We decided on an inverted V shape for our wall hanging.
The Result: A Boho Oasis on a Budget
This simple DIY yarn wall hanging was a great solution to filling a large blank wall on a budget. It added a lot of texture and color to the wall without costing much at all. If you’re looking for more DIY and craft projects, here are some you might like to try:
- DIY Stenciled Doormat Tutorial
- DIY Paint Dipped Glass Vase
- Simple Minimalist Wreath Craft
- Resin Coasters for Beginners
With these DIY projects, you can bring some boho flair and pops of color into your home without breaking the bank. So get creative, have fun, and happy crafting!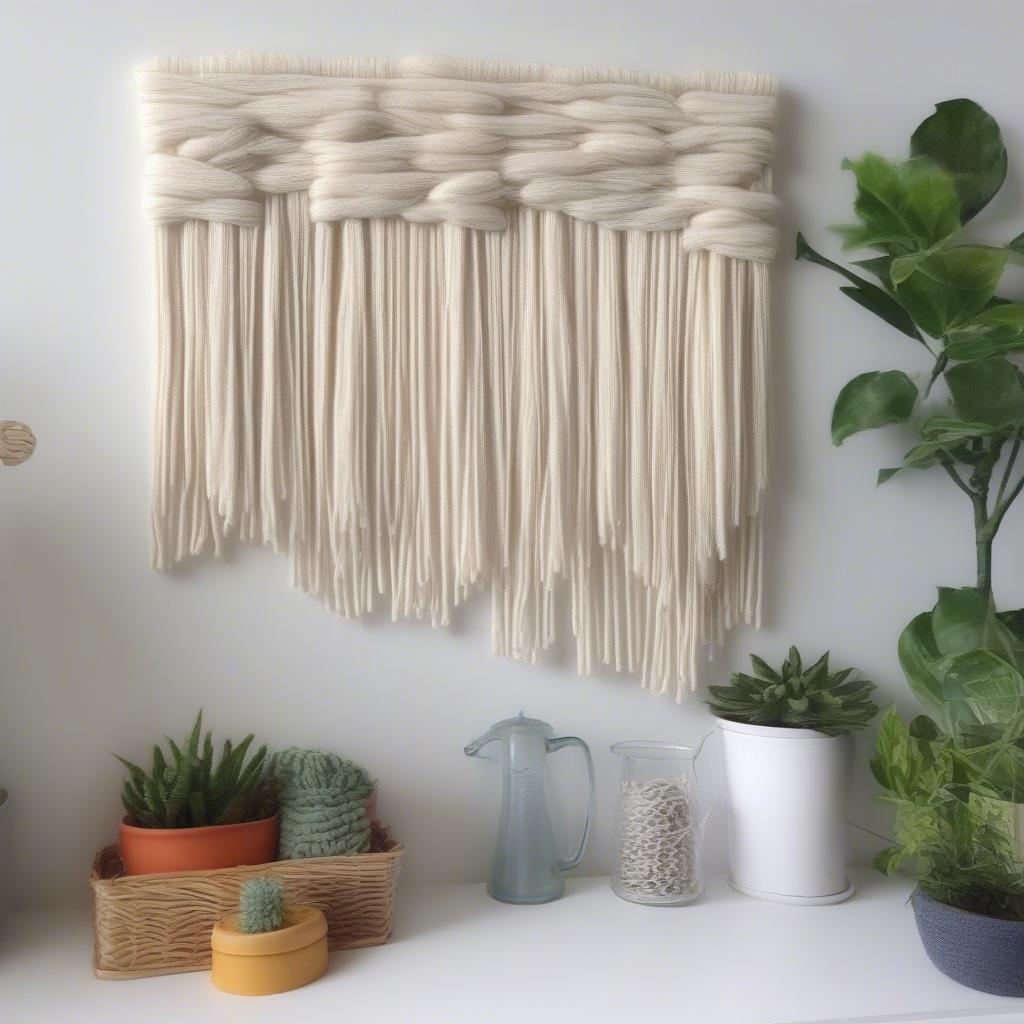 What is the material cost for the DIY yarn wall hanging?
Less than $10.
What materials are needed for the DIY yarn wall hanging?
Dowel, copper pipe, or branch; yarn in various colors; tape measure; scissors; painters tape; twine (optional).
What is the first step in making the yarn wall hanging?
Gather all the materials needed for the project.
How should one decide on the pattern for the yarn wall hanging?
Plan out the design ahead for a symmetrical piece or be flexible for an asymmetrical design.
What is the process for cutting and attaching the yarn to the pole?
Cut pieces of yarn double the desired length of the wall hanging, fold them in half, and attach them to the pole by poking the ends through a loop and pulling tight.
How do you trim the yarn wall hanging after it is hung?
Trim the yarn ends into shape, either straight across, into a symmetrical shape, or on an angle.
What kind of look does this project achieve?
Adds texture and color to a wall with a boho theme.
Are there other DIY projects mentioned in the article?
Yes: DIY Stenciled Doormat Tutorial, DIY Paint Dipped Glass Vase, Simple Minimalist Wreath Craft, Resin Coasters for Beginners.