DIY Ikea Hack: Upgrading Besta Unit with Cane Webbing
Are you looking for a creative and budget-friendly way to upgrade your storage units? Look no further. Today, we’re sharing a fantastic Ikea hack that will transform your Besta unit into a stunning piece of furniture with a unique cane webbing design.
The Inspiration
For a while, I had been dreaming of installing cabinets with cane webbing doors, similar to those found in high-end furniture stores. However, when I finally saw the price tag, I was taken aback. The cost was prohibitively expensive, and I thought to myself, “There must be a more affordable way to achieve this look.” As a DIY enthusiast, I decided to take on the challenge and find a more budget-friendly solution.
The Besta Unit: A Perfect Canvas
That’s when I stumbled upon the Besta unit from Ikea. This versatile storage system is perfect for a DIY project, and I was excited to see how I could modify it to fit my vision. I purchased two double Besta units and the 4-pack of NANNARP Legs, which would serve as the foundation for my project.
Researching Cane Webbing Tutorials
To get started, I began researching cane webbing tutorials online. I was surprised to find numerous methods for attaching cane webbing to doors and furniture. Some tutorials suggested gluing the cane webbing, while others recommended stapling it. One common thread among the tutorials was the importance of soaking the cane webbing in a tub of warm water before working with it.
Preparing the Cane Webbing
I ordered 8 feet of 24-inch wide cane webbing from Amazon and submerged it in my bathtub, filled with warm water. This step is crucial, as it makes the webbing more pliable and easier to work with. Once I had measured and cut the individual pieces, ensuring they were all facing the same direction, I laid them flat to dry.
Learning from Mistakes
In my initial attempt, I tried breaking the glass on the Besta unit to staple the cane webbing, as some bloggers had suggested. Unfortunately, this resulted in ruining the door, as the glass was glued into the frame. Ikea’s manufacturing process had changed, making it impossible to remove the glass without causing damage.
Key Takeaways
- Not all glue is created equal. It’s essential to use the right type of glue for this project.
- Removing the doors from the Besta unit is a must before gluing the cane webbing.
The Right Glue
After experimenting with different adhesives, I found that using a combination of Gorilla Glue CONTACT ADHESIVE in clear and Loctite worked best. I applied the Gorilla Glue around the perimeter of the glass and in an X pattern across it, while using Loctite as dots on the underside of the cane webbing.
Choosing the Right Side of the Cane Webbing
One side of the cane webbing has a shiny finish, while the other side has a more natural, unfinished look. I opted for the natural side, as it had a more subtle tone that fit my desired aesthetic.
The Gluing Process
With the doors removed and the cane webbing prepared, I began the gluing process. It’s essential to hold the cane webbing in place while the glue dries. I used heavy items around the house to weigh down the webbing, shifting them periodically to ensure even adhesion.
Up Close and Personal
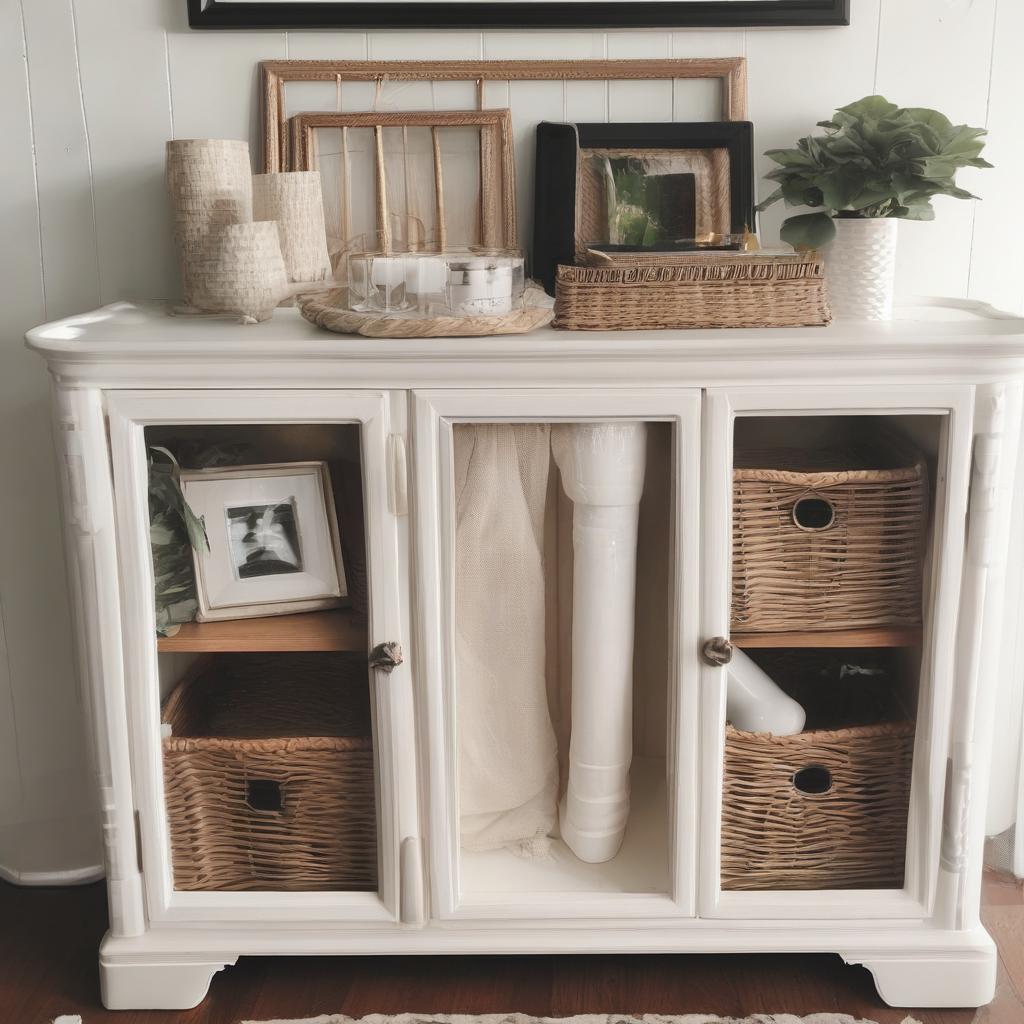
From the inside, the finished product looks great, with the cane webbing adding a unique texture and visual interest. The kids are enjoying the storage space, and it’s been great for hiding toys and craft items.
The Finished Product
The total cost for this project was $610, which is a fraction of the cost of purchasing a pre-made cane webbing cabinet. My husband, Ronnie, loves the look of the finished product, although our daughter, Zoey, remains unimpressed.
Project Details
- Besta Unit: The foundation of the project
- Nannarp Legs: Used to elevate the unit
- Cane Webbing: 8 feet of 24-inch wide webbing
- Loctite: Used in conjunction with Gorilla Glue
- Gorilla Glue CONTACT ADHESIVE: Clear adhesive used for bonding cane webbing
By following these steps and using the right materials, you can create a stunning storage unit that adds a touch of elegance to any room. So, get creative, and happy DIY-ing.
Frequently Asked Questions
What is the main objective of the DIY project? *_To upgrade the Ikea Besta unit with cane webbing for a unique look_*.
What is the total cost of the project? *_$610_*.
What type of glue is used for attaching cane webbing? *_A combination of Gorilla Glue CONTACT ADHESIVE and Loctite_*.
Why is soaking cane webbing necessary? *_To make the webbing more pliable and easier to work with_*.
What is the width of the cane webbing used? *_24 inches_*.
How many Besta units were used for the project? *_Two double Besta units_*.
What is the purpose of using NANNARP Legs? *_To elevate the Besta unit_*.
Which side of the cane webbing is preferred? *_The natural, unfinished side_*.
How is the cane webbing held in place while the glue dries? *_Using heavy items to weigh down the webbing_*.
What was the issue with removing the glass from the Besta unit? *_The glass was glued into the frame and couldn’t be removed without damage_*.