Mastering the Art of Panel Moulding Installation: A Step-by-Step Guide
Have you ever walked into a room and felt an instant sense of comfort and style, but couldn’t quite put your finger on what makes it so special? Often, it’s the millwork that provides the perfect backdrop for an interior setting. In this article, we’ll delve into the world of panel moulding and provide a comprehensive guide on how to install it like a professional finish carpenter.
The Power of Millwork in Home Design
Millwork is an element of home design that I’m passionate about, and for good reason. It has the ability to transform a room and add a level of sophistication that’s hard to replicate with other design elements. In previous posts, we’ve discussed the importance of selecting the right millwork profiles and finding the perfect profile for your home. However, this post is specifically focused on the installation process for panel moulding.
The Benefits of Panel Moulding
Panel moulding installation is not a difficult process, but it does require patience and attention to detail. The end result, however, is well worth the effort. With panel moulding, you can:
* Add balance and texture to a room
* Enhance your architecture
* Frame a wall or vignette
* Create a custom and finished look
Supplies and Tools Needed
Before we dive into the installation process, let’s cover the supplies and tools you’ll need:
- Finishing nailer with compressor
- Wood glue
- Miter saw
- Laser level with tripod
- Regular level
- Caulk
- Filler
- Sanding block
- Miter clamp set
- Panel moulding millwork (we used a profile from Metrie)
The Installation Process: A Step-by-Step Guide
Now that we have our supplies and tools ready, let’s walk through the installation process.
Step 1: Measure and Plan
The first step in any installation process is to measure and plan. I typically create a design plan that includes measurements, and then work with Emmett to mark it off and make adjustments as needed. A laser level is incredibly helpful for this step.
Step 2: Make Your Cuts and Dry Fit
Once we have our measurements, Emmett prefers to cut multiples at a time using a miter saw. Dry fitting is crucial to ensure that your miters align and the length is accurate. We test the vertical pieces first, then the horizontal pieces, and make sure they fit together nicely.
Step 3: Level and Nail
With our pieces cut and dry-fitted, it’s time to level and nail. We always begin by installing the top piece of the rectangle first. Even though we have a laser level set up, we double-check with a handheld level. Once it’s perfectly level, we use a finishing nailer to secure it to the wall, inserting nails every 10-12 inches.
Step 4: Glue the Edge and Secure with a Miter Clamp
Next, we dab a bit of glue onto the unfinished miter of the vertical piece, align it, and secure the miter using a miter clamp. It’s okay if a little glue squeezes out – we’ll clean it up later.
Step 5: Nail the Vertical Piece in Place
Once the miter clamp is set, we use a finishing nailer to secure the vertical piece to the wall. It’s essential to note that you don’t have to nail panel moulding into a stud. However, to ensure it stays put, we drive nails from opposing directions.
Nail Placement is Key
In the image below, Emmett is driving a nail from the top downward into the piece of panel moulding. In the next image, you’ll see him driving the nail from the bottom upward into the panel moulding. These two nails are placed about an inch apart, which will lock the piece into place and create a secure, permanent set.
Step 6: Repeat the Process
We repeat the process until three sides of the rectangle have been installed. When we get to the lower horizontal section, we only nail half of it. This allows us to have some wiggle room to create a tight miter.
Step 7: Install the Last Piece and Secure the Miters
Next, we move onto the last vertical piece, securing it with glue and a miter clamp. Then, we add the remaining finishing nails, including the other half of the lower horizontal piece.
Step 8: Wipe Excess Glue
After clamping the miters, we wipe any excess glue that squeezed out. It’s much easier to wipe and remove wet glue than it is to sand dried glue after it has cured.
Step 9: Fill the Nail Holes
We use a high-quality filler to fill the tiny nail holes. We’ve tried many fillers, and this one is the best. Fill the holes, making sure you have excess to sand for a smooth look – more is better than too little at this stage.
Step 10: Sand the Filler
Once the filler has set, it’s time to sand the profile smooth. We’ve found that sanding blocks make this step quick and easy.
Step 11: Caulk and Paint
After sanding the millwork, we caulk the edges to make it look custom and finished. Once the caulk has completely set, we can move onto painting. Emmett prefers using a paint sprayer, while I prefer using a nice paintbrush with a good self-leveling paint to eliminate brush marks.
Tips and Variations
When it comes to panel moulding, the possibilities are endless. You can use it to frame a wall, frame a vignette, enhance your architecture, add balance, and texture. Sometimes I choose to paint it the same color as the wall for a monochromatic look, while other times a little contrast is nice. It all depends on the aesthetic you’re trying to achieve.
Conclusion
I hope this detailed tutorial has been helpful in providing you with the confidence to tackle a panel moulding installation project. If you have any questions at all, please leave them in the comment section below. This is truly a fun and rewarding project that has the ability to totally transform a room. Happy DIY-ing!
Additional Examples of Panel Moulding
We’ve had the opportunity to work on several panel moulding projects in the past, and I’d like to share a few examples with you.
Example 1: Framing a Wall
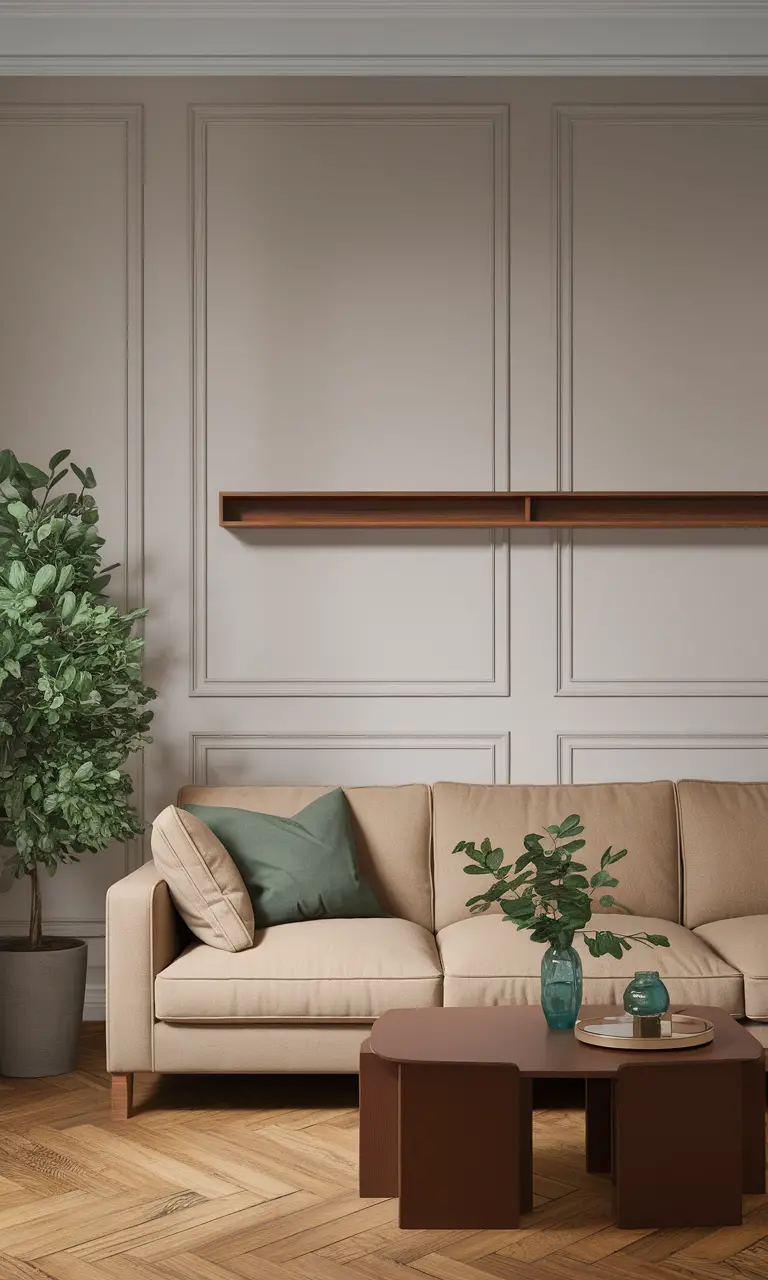
In this example, we used panel moulding to frame a wall and add some texture to the room. The result was a beautiful and sophisticated space that feels cozy and inviting.
Example 2: Enhancing Architecture
In this example, we used panel moulding to enhance the architecture of the room. By adding panel moulding to the existing design, we were able to create a more custom and finished look.
Example 3: Creating a Monochromatic Look
In this example, we painted the panel moulding the same color as the wall to create a monochromatic look. The result was a cohesive and harmonious space that feels calm and serene.
Getting Started with Your Own Panel Moulding Project
If you’re inspired to start your own panel moulding project, I encourage you to go for it! It’s a fun and rewarding DIY project that can add a level of sophistication to any room. Don’t be afraid to reach out if you have any questions or need further guidance.
Resources
If you’re interested in learning more about millwork and panel moulding, I recommend checking out our previous posts:
These posts provide a wealth of information on finding the perfect profile for your home and working with moulding millwork.
Conclusion
Panel moulding installation is a fun and rewarding DIY project that can add a level of sophistication to any room. With the right tools and supplies, you can create a beautiful and custom look that will withstand the test of time. I hope this tutorial has been helpful, and I look forward to seeing your own panel moulding projects!
Final Tips and Tricks
* Make sure to use a laser level to ensure accuracy and precision
* Use a finishing nailer to secure the panel moulding to the wall
* Don’t be afraid to experiment with different profiles and designs
* Take your time and be patient – it’s worth it in the end
By following these tips and tricks, you’ll be well on your way to creating a beautiful and custom panel moulding installation that will enhance any room in your home. Happy DIY-ing!
- Always use a level to ensure accuracy and precision
- Make sure to fill nail holes and sand smooth
- Caulk and paint to create a custom and finished look
What is panel moulding used for? *_To add balance and texture to a room, enhance architecture, frame a wall or vignette, and create a custom and finished look._*
What tools are needed for panel moulding installation? *_Finishing nailer with compressor, wood glue, miter saw, laser level with tripod, regular level, caulk, filler, sanding block, and miter clamp set._*
How do you ensure accurate measurements? *_By creating a design plan with measurements and using a laser level to mark and make adjustments._*
How do you secure panel moulding to the wall? *_Using a finishing nailer to insert nails every 10-12 inches, and driving nails from opposing directions to lock the piece into place._*
What is the purpose of dry fitting? *_To ensure that miters align and the length is accurate before securing the pieces to the wall._*
How do you finish the nail holes? *_By filling them with a high-quality filler and sanding smooth._*
Can panel moulding be painted? *_Yes, it can be painted to match the surrounding area or to create contrast._*
What is the benefit of using a laser level? *_To ensure accuracy and precision during the installation process._*
How do you achieve a custom and finished look? *_By caulking the edges and painting the panel moulding._*